|
|
|
Categories
|
|
Information
|
|
Featured Product
|
|
|
 |
|
|
There are currently no product reviews.
 ;
Thank you for your manual It has the basic things to and i use the Oszi for Longer Time.
THX
;
Actually, I was looking for this information for 3 years!...now thanks to you, the manual is on my hands and of great help, cause I understand now where I was doing wrong connections and wires...excellent, I'll be back to you if in need, thank you.
 ;
This manual covers the main equipment features only. While it also includes the procedure for saving and loading from the now long obsolete memory cards it does not mention the how to operate with the optional floppy drive interface so I am still at a loss about how to use this! Note that there is a separate manual covering the MIDI interface and programming via the keyboard, not included in this download. You will also need to get hold of this if you want to use the MIDI interface properly. Basically there is little difference between this manual and the free to download manual for the similar PR60 model.
;
Good list of manuals. I found a very rare one and easily get. Should be promptly to download, as we must to wait hours even after confirmed payment.
;
The manual was properly scanned and perfectly readable. The only small problem is that I couldn't use my dear Ctrl + F to find a word I needed.
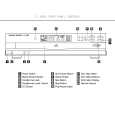
INSTALLATION AND CONNECTIONS
To prevent possible damage to your speakers and other components in your audio system, it is important that ALL components, including the FL 8385 and your receiver or preamp and amplifiers, are turned off and unplugged from their AC power source when installing any new component. Connecting the FL 8385 to your audio system is simple. Using standard RCA-to-RCA interconnect cords, connect the left and right Audio Output Jacks � on the rear panel to the CD input jacks on your receiver, surround processor or preamplifier. If your system includes an optional external digital-toanalog converter, or if you are using a receiver or other processor that has the capability to decode PCM digital input signals, connect the Coaxial Digital Output Jack � to the Coaxial Digital input on the decoder. Make certain to use a coaxial-style interconnect cable, as standard audio cables will not perform as well. Install the two AA batteries supplied with the FL 8385�s remote by turning the remote over so that you are holding the bottom side up. Press lightly on the embossed arrow on the cover and gently slide the cover towards you in the direction of the arrow. Insert the batteries inside the compartment, being careful to follow the + and � polarity indications at the bottom of the compartment. Replace the cover by placing it on the remote and sliding it back towards the top of the remote. NOTE: When replacing batteries, it is always a good idea to replace both at the same time. When the unit will not be used for an extended period of time, it is also a good idea to remove the batteries so that the potential for corrosion or damage is avoided. If the FL 8385 is installed behind a cabinet or other obstruction that may block the path between the front panel Remote Sensor $ and the location of the remote, an optional external IR sensor may be used. Connect the sensor to the Remote Control Input Jack ¢ on the rear panel. This jack may also be connected to the IR-Output jack of another compatible Harman Kardon component or a compatible IR-system-remote product. You may also use the IR Sensor in the FL 8385 to send commands to other compatible remote controlled products. Connect the Remote Control Output Jack £ to the input of the other product or system. Connect the power to a nonswitched AC wall outlet or to the accessory outlet on the rear of another audio device in your system and you are ready to go! NOTE: When using the accessory outlet on another product to power the FL 8385, make certain that it has the compatibility to power a device that draws at least 20 watts of current in addition to being able to handle the requirements of the other devices that may be plugged into the accessory outlets. If you use a �switched� outlet, it is important to remember that the host product must be turned on in order for the FL 8385 to operate.
�
10
INSTALLATION AND CONNECTIONS
|
|
|
> |
|